The Poor Man's Photo Interrupter
Taken from Bens Site: http://www.geocities.com/k4zep/PT.htm
Here we have a side view and a top view of the Photo Interrupter
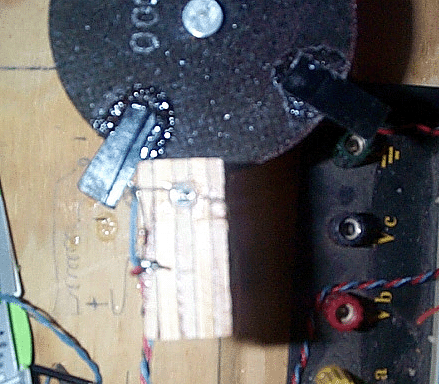
Notice the tab on the left-hand picture, a magnet is right under it. It actually pulses the magnet 90 to the left and under the next magnet.
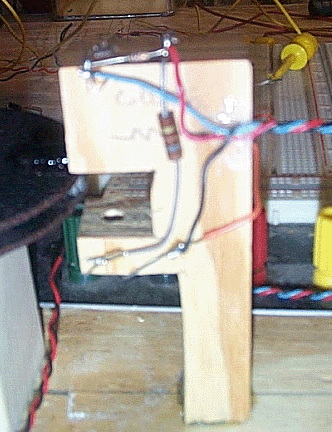
Also, notice the hole in the picture on the left, the beam of IR light goes through it from top to bottom (Doesn’t matter which way) and the tab interrupts the beam as it passes by. In my case, the Interrupter is simply glued to the base after best timing is obtained!
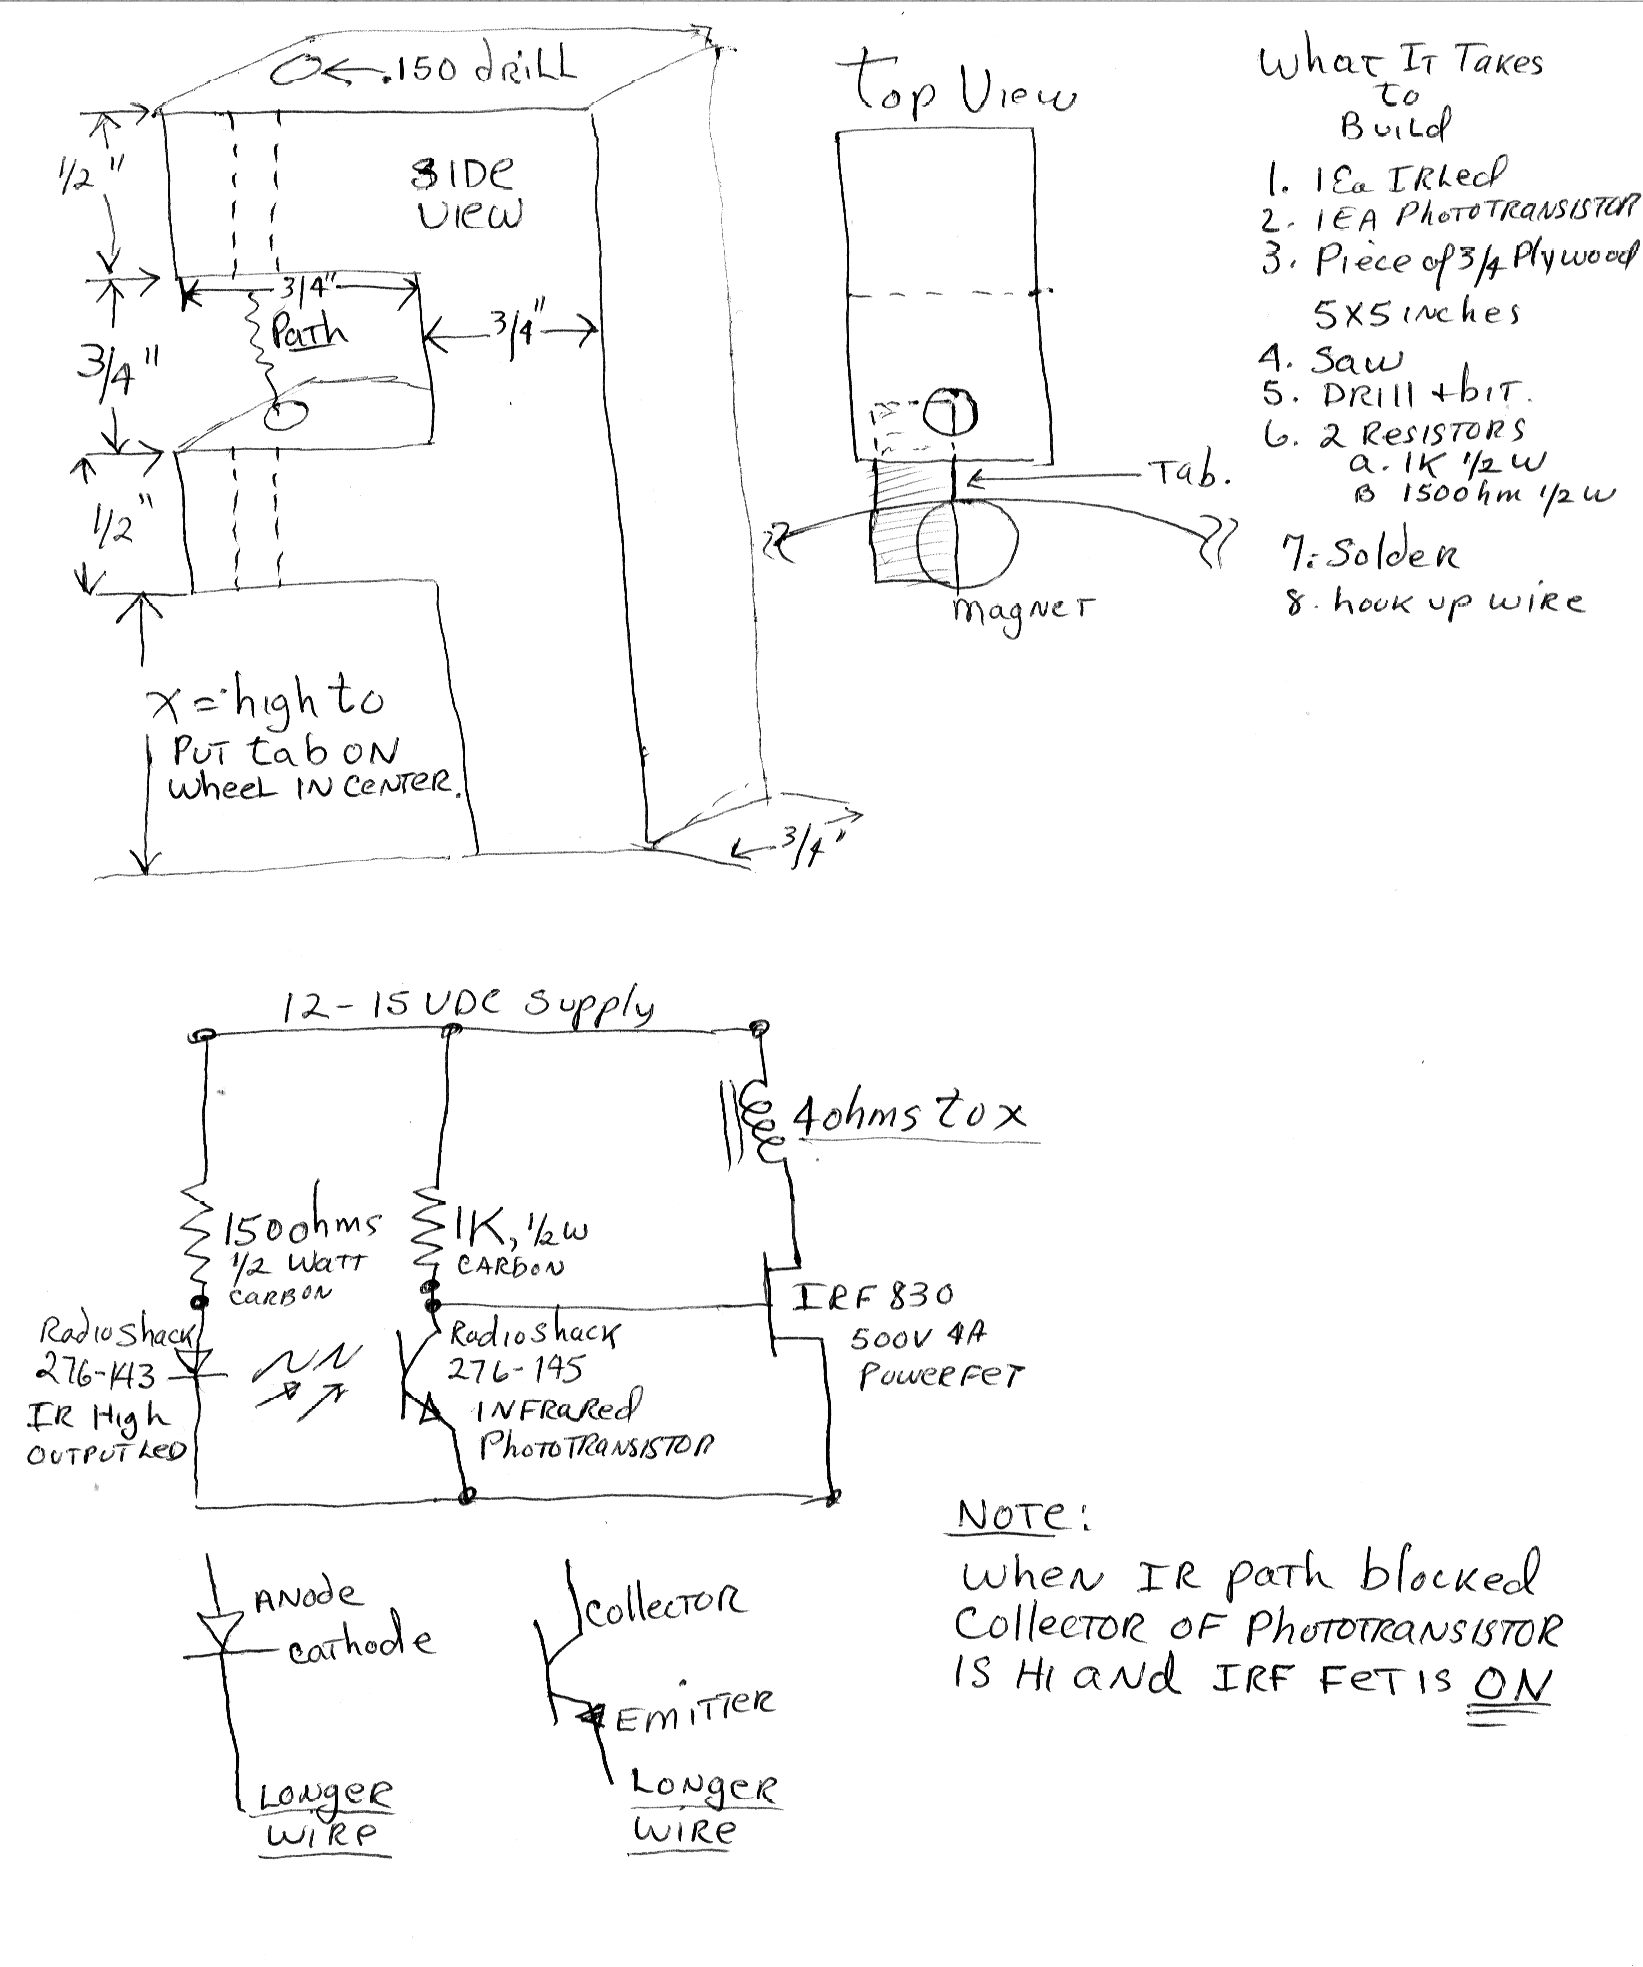
Now gang, you have to be able to solder, read a resistor code, drill a hole and cut out a piece of wood to build this thing. It isn't rocket science. If you have a rotor already built and can add 4 tabs that stick out 1/2 to 3/4 inch in phase with the magnets; you are almost there. The only thing you have to determine is "X" distance on the drawing above to put the tab in the middle of the top two fingers of the "Finger". You can make it as neat or as ugly as you want. Mine took all of 3 Min. to make and looks it. You can see the hole I drilled from the top through the bottom finger. The IR LED can go in the top hole or the bottom hole; it does not make any difference, the phototransistor will go in the other hole. The two devices can be held in the hole with a bit of "zap" or you can drill the hole for a press fit. You must keep track of which is which, which is the long wire and which is the short wire on the two devices so you can wire it up right. Mine was wired up with point to point "Blobs", which is OK if you never get off the ground with it. If you make the device so you can slide it perpendicular to the sides of the wheel, it can be adjusted to Max. speed. You can adjust the "ON" time by adjusting the width of the tabs, etc. There are many ways to do this; this is just a simple one.
Enjoy
Ben